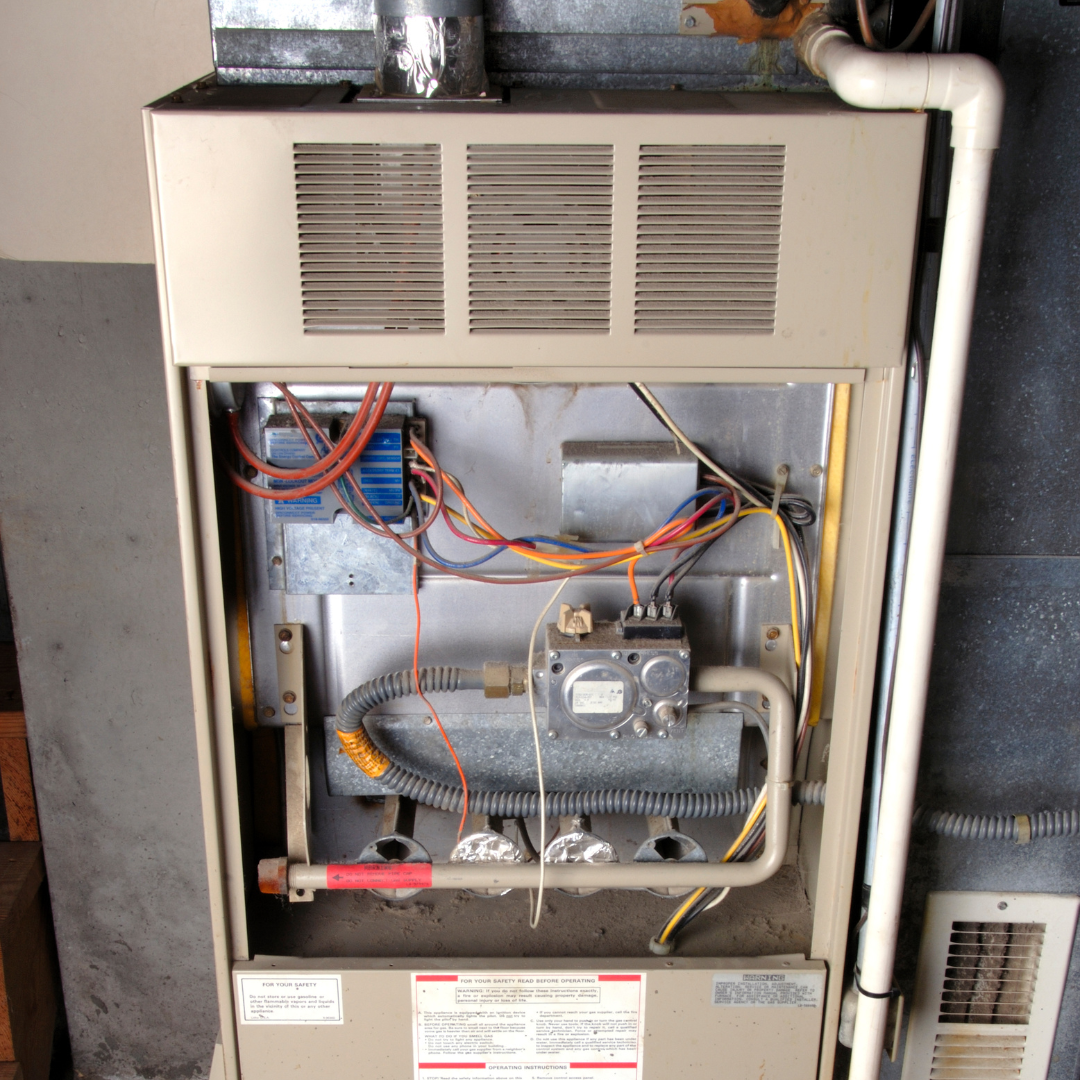
By following these easy measures to keep your furnace in good shape, you may save money while increasing the comfort and efficiency of your heating system.
You can complete all of these chores in less than three hours, for a little cost, and with just a few simple hand tools. That is a reasonable amount for insurance to ensure a worry-free winter of comfortable, economical warmth.
Without your furnace breaking down or not producing enough heat, winter is already difficult. Additionally, an ounce of prevention really is worth a pound of cure when it comes to furnaces.
Here are some simple maintenance procedures you can perform to make sure your furnace, whether it runs on natural gas or propane, is in top shape throughout the winter.
Step 1: Take the Combustion Chamber Door off.
You won’t need a new furnace if you perform maintenance yourself. The combustion chamber door should be lifted up and pulled out, and the burner cover should be removed before you begin to repair your furnace (if you have one). Two screws are typically used to secure it.
Step 2: Check the burner flames
Turn on the electricity and start the burners by increasing the thermostat. Observe the burner flames. The flames should be blue and pretty even.
Yellow flames indicate that the burners are dirty. (Don’t breathe on the flames since the extra oxygen will turn them yellow.) Don’t mess with the burners. Hire a professional.
Step 3: Clean the Burner and Blower Cavities
Turn off the power switch once again and close the gas valve one-quarter turn. Clean the furnace burners and furnace foundation. Tape a 20-inch piece of cardboard to the rear of the burners to get access. 1/2-inch length Connect the drain pipe to your vacuum hose.
Vacuum everywhere there is dust. While everything is open, examine for soot (fine black powder), which frequently signals poor combustion, with a flashlight. Vacuum the blower compartment by removing the lower door (blower door).
Step 4: Remove the Blower to Clean It
To clean the blower (also known as a squirrel cage), remove it. If you have a control panel in front of the blower, unscrew two screws and hang it. Then, with a 7/16-in. Remove the two bolts that hold the blower in place with a socket and ratchet, then carefully take it out.
Step 5: Vacuum and Brush the Blower Blades
Using a vacuum and a tiny brush, carefully clean the blower blades. Take care not to overstress the wiring or to disrupt the counterweights on the fan blades. If you can’t fully clean the blower, don’t clean it at all; you could throw it off balance.
Step 6: Replace the Furnace Filter
Every one to three months, replace the furnace filter. A $1 fiberglass filter will enough to protect the blower and motor. Check the owner’s handbook for manufacturer recommendations if you wish to install a more costly, high-efficiency filter.
High-efficiency filters can limit airflow, strain the blower motor, and reduce the performance of your furnace. A separate air-cleaning system is the best alternative if you want cleaner air.
Step 7: Remove the Pilot’s Dust
Blow the dust off the pilot. Blow air directly into the target area using a drinking straw. A filthy pilot might allow the flame sensor (or thermocouple) to report that the pilot is not lit. Some modern furnaces use hot surface igniters instead of pilots and electronic igniters.
Step 8: Make sure the flame sensor is clean.
On rare occasions, the flame sensor will develop a buildup of residue and stop igniting your furnace. Pull it out of the bracket by tugging it downward. Reinstall the sensor into its mount after using a fine emery cloth to lightly clean the surface.
Step 9: Dust the Hot Surface Igniter Without Touching It
The most popular igniting device for furnaces being made now is a hot surface igniter. Standing pilot lights and electronic igniters are replaced by them. By keeping the hot surface igniter in place and using a straw to blow air through, you may remove the dust.
Don’t even try to touch this component; it breaks extremely quickly. In fact, be careful not to damage the igniter when replacing the furnace doors.
Step 10: Check the Drive Belt
The belts on belt-driven blowers may need adjusting or replacing to fix your heating. Check the drive belt for fraying or cracks. Install the replacement belt with sufficient strain to cause a 1/2 to 3/4 in deflection.
Step 11: If needed, lubricate the bearings.
Two motor bearings and two blower shaft bearings in certain older furnaces need to be oiled annually. Remove the oil covers and clean the area around them. Replace the caps after adding two to three drops of light machine oil. Avoid overlubricating!
Step 12: If necessary, adjust the dampers
If the air conditioning and heating ducts in your furnace contain dampers, you may need to adjust them according to the seasons. Marking the seasonal settings is necessary. Homes with two stories frequently have separate supply trunks to service the upper and lower floors.
Adjust the damper handle on each supply trunk to deliver more warm air downstairs (winter setting) or more cold air upstairs (summer setting).
Step 13: Seal Air Duct Leaks
Use specialized metal tape or high temperature silicone to seal leaking ducts, particularly return air ducts. Then, do a backdrafting test to ensure that the combustion gasses are directed upward into the flue: Set the thermostat so that the burners are on. Keep an incense stick lit next to the draft hood. The hood should be used to draw in the smoke.
While they are still cool, check the exhaust vent pipes on your water heater and furnace. Corrosion may be indicated by white powdery residue. Hire a professional to solve these issues. Energy-efficient brands may be your best choice if you’re searching to buy the greatest furnace.


